在CMD輸入以下指令
mkdir type_react_demo
cd type_react_demo
npm init
之後會跳出這些選項 都直接按Enter就好
package name: (type_react_demo)
version: (1.0.0)
description: demoproject_typescript_react
entry point: (index.js)
test command:
git repository:
keywords:
author:
license: (ISC)
About to write to C:\Users\samchen\typereact\type_react_demo\package.json:
{
"name": "type_react_demo",
"version": "1.0.0",
"description": "demoproject_typescript_react",
"main": "index.js",
"scripts": {
"test": "echo \"Error: no test specified\" && exit 1"
},
"author": "",
"license": "ISC"
}
繼續輸入以下指令
npm i -D webpack webpack-cli
mkdir src
code .
用code .會打開VS CODE編輯器 自動載入這個Folder
之後在src內建立一個index.js
內容就直接console.log("Hello world")即可
然後到package.json修改scripts內容如下
"scripts": {
"build": "webpack --mode production"
},
然後在CMD輸入 npm run build
應該就能看到webpack 編譯並執行我們的index.js檔
在src內新增一個index.html
<!DOCTYPE html>
<html lang="en">
<head>
<meta charset="utf-8" />
<title>React Plus TypeScript</title>
</head>
<body>
<script src="./main.js"></script>
</body>
</html>
之後在CMD輸入指令
npm i -D html-webpack-plugin
在資料夾type_react_demo目錄下新增webpack.config,js
const HtmlWebpackPlugin = require('html-webpack-plugin');
module.exports = {
plugins: [
new HtmlWebpackPlugin({
template: './src/index.html',
filename: 'index.html',
}),
],
};
之後修改package.json的內容
"scripts": {
"build": "webpack --mode production",
"start": "webpack-dev-server --open --mode development"
},
CMD執行 npm install --save-dev webpack-dev-server
npm start
之後就會看到瀏覽器跳出localhost:8080
按F12
可以看到我們的HelloWorld出現
最後再加入.gitnore檔案到type_react_demo目錄
node_modules
dist
.DS_Store
CMD輸入npm i -D typescript ts-loader
一樣在資料夾type_react_demo目錄下新增tsconfig.json
並輸入以下內容
{
"compilerOptions": {
"target": "es6", //指定編譯生成的JS版本
"module": "es6", //指定生成哪種模組
"strict": true, //採用嚴格模式
"esModuleInterop": true, //兼容模組導入的方式
"skipLibCheck": true,
"noEmit": true,
"sourceMap": true,
"moduleResolution": "Node",
"resolveJsonModule": true
},
"include": [
"./src/**/*"
]
}
把之前創的webpack.config.js修改為以下內容
const HtmlWebpackPlugin = require('html-webpack-plugin');
module.exports = {
entry: './src/index.ts',
resolve: {
extensions: ['.js', '.ts', '.tsx'],
},
module: {
rules: [
{
test: /\.tsx?$/,
loader: 'ts-loader',
exclude: /node_modules/,
},
],
},
plugins: [
new HtmlWebpackPlugin({
template: './src/index.html',
filename: 'index.html',
}),
],
};
然後把index.js刪掉 加入index.ts
function log(str: string) {
console.log(str);
}
log('Hello World!!!');
在CMD輸入
npm i -D @babel/core @babel/preset-env @babel/preset-typescript
新增.babelrc
{
"presets": ["@babel/preset-env", "@babel/preset-typescript"],
"plugins": ["@babel/plugin-proposal-class-properties"]
}
修改webpack的設定如下
module: {
rules: [
{
test: /\.tsx?$/,
loader: 'babel-loader',
exclude: /node_modules/,
},
],
},
在CMD輸入 npm i -D @babel/plugin-proposal-class-properties
修改package.json如下
{
"name": "type_react_demo",
"version": "1.0.0",
"description": "demoproject_typescript_react",
"main": "index.js",
"scripts": {
"build": "npm run type-check && webpack --mode production",
"start": "webpack-dev-server --open --mode development",
"type-check": "tsc"
},
"author": "",
"license": "ISC",
"devDependencies": {
"@babel/core": "^7.17.10",
"@babel/plugin-proposal-class-properties": "^7.16.7",
"@babel/preset-env": "^7.17.10",
"@babel/preset-typescript": "^7.16.7",
"html-webpack-plugin": "^5.5.0",
"ts-loader": "^9.3.0",
"typescript": "^4.6.4",
"webpack": "^5.72.0",
"webpack-cli": "^4.9.2",
"webpack-dev-server": "^4.9.0"
}
}
接下來就是下載React
在CMD輸入
npm i -S react react-dom
npm i -D @types/react @types/react-dom
在tsconfig內的compileroptions加入
"jsx": "react",
把原本的index.ts刪除
另外新增一個index.tsx
import React from 'react';
import ReactDOM from 'react-dom';
const App = () => {
return <div>Hello World</div>;
};
ReactDOM.render(<App />, document.getElementById('root'));
index.html也要跟著改
<!DOCTYPE html>
<html lang="en">
<head>
<meta charset="utf-8" />
<title>React Plus TypeScript</title>
</head>
<body>
<div id="root"></div>
</body>
</html>
在babelrc內加入以下設定
"@babel/preset-react",
最後修改webpack內entry的路徑
entry: './src/index.tsx',
修改完後執行npm start
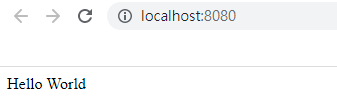
就可以看到Hello World
專案的環境也都設定好了
之後在src建立一個data資料夾並在data資料夾內建立一個pizza.json
[
{
"id": 1,
"name": "Napoletana",
"description": "Fresh tomatoes and mozzarella cheese.",
"price": 14.99
},
{
"id": 2,
"name": "Marinara",
"description": "Fresh tomatoes, extra virgin olive oil, oregano and garlic.",
"price": 14.99
},
{
"id": 3,
"name": "Caprese",
"description": "Fresh mozzarella, tomatoes, basil and balsamic vinegar.",
"price": 14.99
},
{
"id": 4,
"name": "Margherita",
"description": "Fresh tomatoes, mozzarella cheese, fresh basil, salt and extra-virgin olive oil.",
"price": 14.99
}
]
在src建立一個component資料夾並在此資料夾內建立Pizza.tsx 與App.tsx
Pizza.tsx
import React from 'react';
// 定義Pizza的介面
interface Pizza {
id: number;
name: string;
description: string;
price: number;
}
// 定義Props的介面
interface Props {
pizza: Pizza;
}
// React.FC<Props> 代表型別是Functional Component, 泛型的型別是Pizza
const Pizza: React.FC<Props> = ({ pizza }) => {
return (
<li>
<h2>{pizza.name}</h2>
<p>{pizza.description}</p>
<p>{pizza.price}</p>
</li>
);
};
export default Pizza;
App.tsx
import React from 'react'
import Pizza from './Pizza';
import pizzas from "../data/pizza.json"
const App = () => {
return (<ul>
{pizzas.map((eachPizza) =>{
return <Pizza key = {eachPizza.id} pizza = {eachPizza}/>
})}
</ul>)
};
export default App
外面的index.tsx修改如下
import React from 'react';
import ReactDOM from 'react-dom';
import App from './components/App';
ReactDOM.render(<App />, document.getElementById('root'));
執行npm start就可以看到內容了